Monday 28 July 2014

Red bat - the bat itself

As I mentioned last time, to make a do-it-yourself metallic thread, I intended to stitch the outline of the bat using two strands of stranded cotton and two lengths of a glittery 'holographic' machine embroidery thread.

And I'm pleased to say, it worked:


That's worked in chain stitch, and gives exactly the effect I was working for.  On the downside, it's not much fun to stitch with!  Even threading the needle is a pain, and the two different types of thread are determined to go their own way.

Still, it's looking like I want it to, and that's the main thing, so I'll persevere.

Friday 25 July 2014

Red bat - threads and the bat

With the bat design on the back of the fabric, I can start to stitch over it to mark it up on the front.  It's going to be in red, so I used a red sewing thread to stitch over the bat outline (and only the bat outline at this stage), so that I can stitch over it properly:


What I'm going to stitch over it with was a bit of a conundrum, though.  The background design is too small and detailed to make couching feasible, so Benton & Johnson metallic threads (the ones I used on the OBOD banner) weren't an option, and the Gutermann metallics I usually use for this sort of thing aren't available in red.

Time for some improvisation.


For the bat, I'm using two strands of Madeira stranded cotton no. 0211, a nice bright red, and two lengths of Gutermann Sulky machine embroidery thread no. 6014.  This is also red and quite sparkly, what the manufacturers evidently call 'holographic'.  The intention is to use all four lengths of thread in the needle at the same time.  I haven't done this before, so we'll see how well it works!

Wednesday 23 July 2014

Red bat - design and preparation

A new project to work on!  This is quite a small piece, and shouldn't take too long to do, I don't think.  The person it's for has asked for an outline of a bat against a patterned background.  This is on a black fabric, and worked in red metallic thread.  She's also specified a size: no more than 20 cm (about 8") square.

So, here's the design:


The 'crazy paving' background is a Voronoi diagram, which can be calculated mathematically, but is also found everywhere in nature as it's the most efficient way to arrange shapes of varying sizes on a flat surface.  As such, it gives a nice organic look, and makes a nice change from precisely defined spirals and the like.

The fabric it's to be worked on is black silk matka, and I'm transferring the design in the usual way: making a transfer, ironing that onto some fine linen, attaching that to the back of the matka, and stitching over it to make the design on the back onto the front.  Fiddly, but effective.

Here's the first stage, the transfer on the linen (already attached to the black matka, which is why it looks a bit dark):


I'll do the bat first, I think.

Saturday 19 July 2014

Apple tree fire screen - finished

It's all done, and I'm very pleased.  I'm not 100% happy with the shading on the stems, but they're fine, and the new things I tried - paint and glue! - have been very successful indeed.  This was always meant as an experiment, but I'll definitely be using these techniques again in the future.

So, without further ado, here it is:


Next to the wardrobe and the original panel:


And in situ in the dining room:


I think it goes there nicely - I'm very pleased.

Friday 18 July 2014

Apple tree fire screen - stretching and mounting

I dismantled the fire screen, putting the old embroidery away, and giving the frame a good clean.  There was already a board cut to size for the embroidery to go round, having been used for the old one, so no need to get anything else.  The old one was glazed, but I don't want this to be, so I disposed of the glass.

I want it to seem quite soft, so I stuck some wadding to the board with 505 fabric spray glue:


Centring the embroidery over that, I laced it on the back in the usual way:


That's my name tape on the bottom, for someone in the future to find!

I placed this into the frame:


Then placed the back panel down and screwed it into position:


All done!  I'll show you the finished piece tomorrow.

Wednesday 16 July 2014

Apple tree fire screen - applying the embroidery to the background

With the embroidery safely cut out and all in one piece, it's time to add it to the background.

I'd already got that set up and key reference points marked on the fabric to ensure I got the apple tree design on straight.  I laid the embroidery on the fabric, lining it up with the reference marks, and pinned over - not through - some of the stems to hold it in place:


I then started stitching it down, using single strands of the same shades I used for the embroidery itself.

The outer edge of the stems:


The rest of the stems:


The apples:


And finally the leaves:


Finished!  Or finished the embroidery, anyway - the last thing to do is to stretch it onto a board and put it into the fire screen itself.

Saturday 12 July 2014

Apple tree fire screen - cutting out the embroidery

Time to get out the scissors!  The reason I painted glue on the back of the stitching was so I could cut it out without the whole thing falling to bits.  Once cut out, the embroidered slip will be stitched to the background fabric.

This is the same principle as I used for the flowers on St Cuthbert's Banner, if long-time readers can remember that, though in that case there was no glue involved: I cut the flower shapes out slightly larger, so with a sort of seam allowance of linen all round, and then tucked this under as I stitched the shape down.  That was a very fiddly operation, especially as the edges of the cut linen frayed; this time, the use of the glue should make life much easier.

Or that was the theory, and I'm happy to say that it seems to be working, at least so far.  I cut the shape out as close to the embroidery as I could, using small sharp scissors.

Here it is with the fabric cut away from around the outside of the shape:


And then with all the awkward shapes on the inside also cut away:


That's just the embroidery, not supported by any fabric, and with just the thin layer of glue on the back holding it all together.  I told you I was nervous about all this - now you can see why!

It is holding together, however, so now I can stitch it to the marked-up background fabric.

Wednesday 9 July 2014

Apple tree fire screen - getting the background ready

Although the embroidery was done onto organza, that's not the final fabric for the finished piece, which is an ivory cotton velvet.  With all the embroidery completed, it's time to get that ready.

I'm going to be applying the embroidery to the velvet background, so in order to make sure I get it on straight, I traced some key points in the design with a transfer pencil, and ironed them onto a piece of linen:


I stitched this to the back of the velvet, then stitched over the lines with a dark yellow sewing thread, to transfer them onto the front:


Time to add the embroidery, so I can't put the next stage off any longer.

Sunday 6 July 2014

Apple tree fire screen - glue...

On the whole, I've never felt that glue and embroidery go together.  I'll admit to occasionally using small amounts of 505 fabric spray glue to hold small, fiddly appliqué shapes in place before I stitch them, but that's all.  I dislike Bondaweb and other fusible fabrics and never use them, and wouldn't dream of using proper glue anywhere near my work.

Until now.

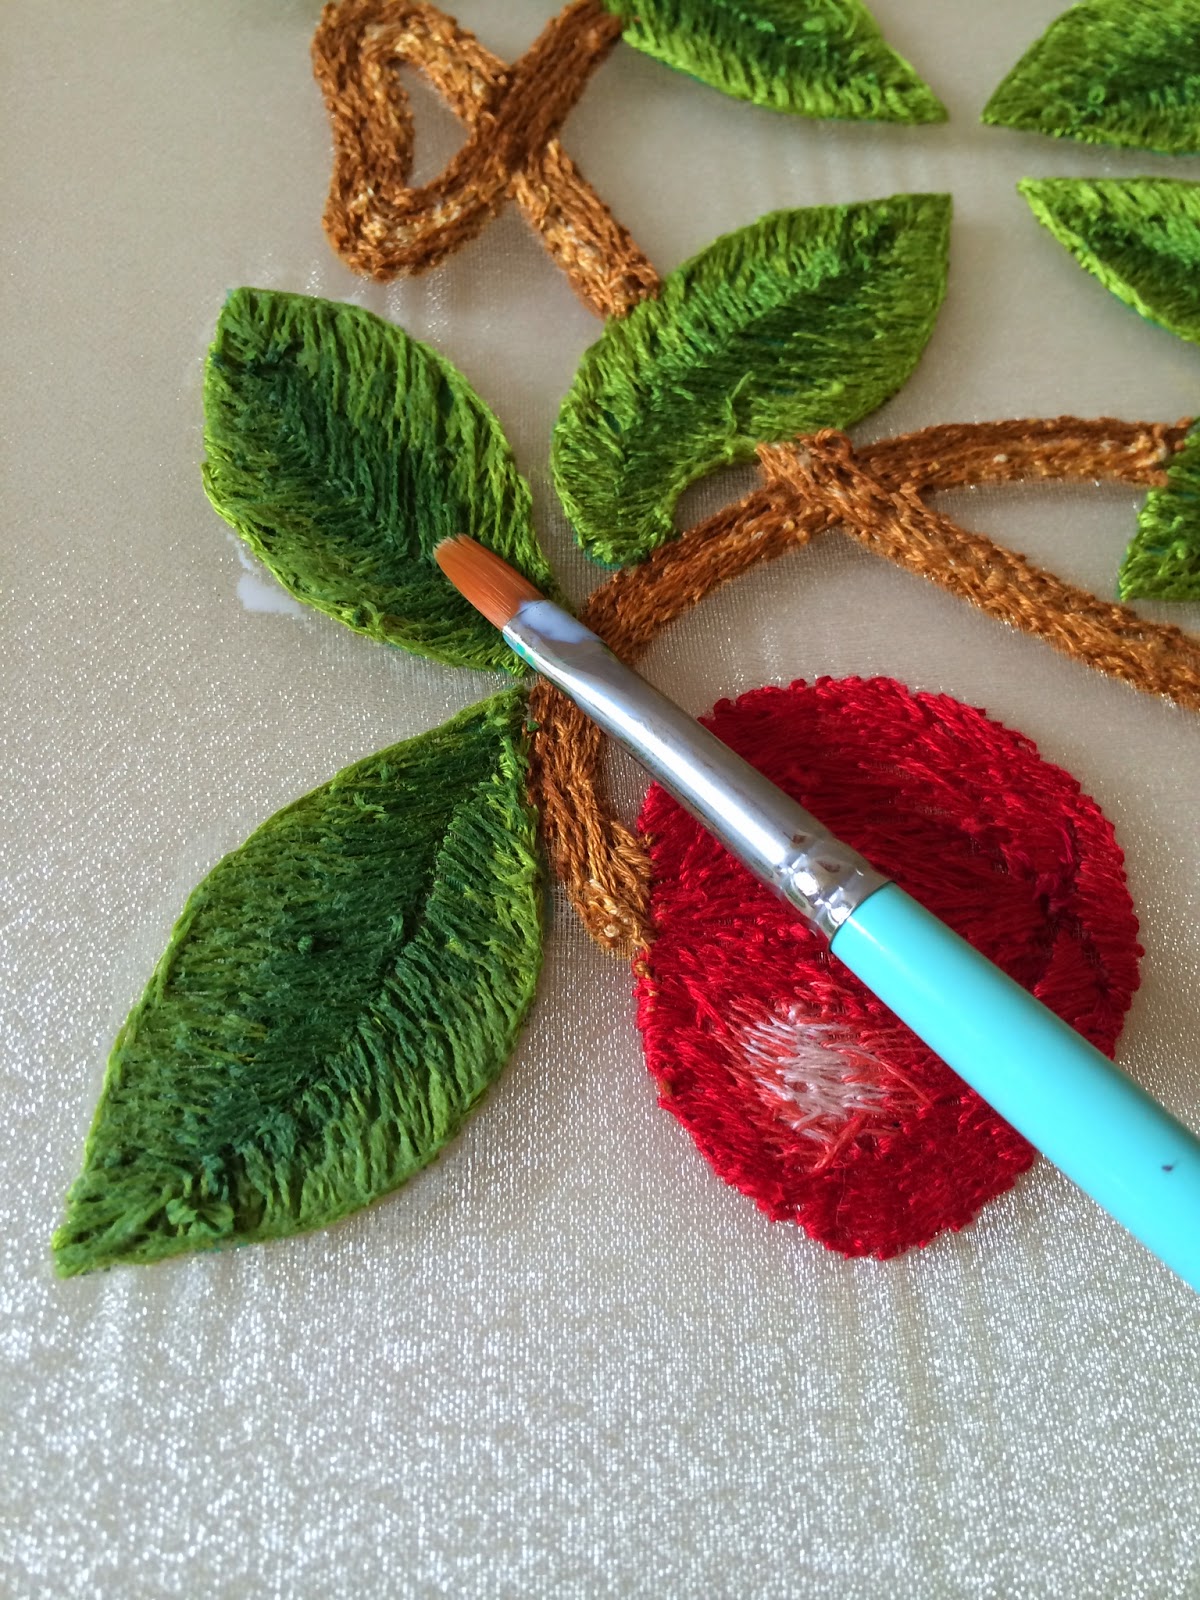
In her description of her technique, Michele Carragher says that she paints a thin layer of glue over the back of the work to hold the stitches in place.  I'm following her instructions for this, so like it or not, that's what I had to do next.

'A thin layer of glue' is a bit unspecific, so I opted for PVA craft glue (i.e. white glue), which I thinned down with about a 1:1 ratio of glue to water, though I didn't measure it out precisely.  Time to get painting!


I painted the glue over the back of all the stitching, and deliberately went beyond it onto the fabric too.  This all made me very nervous, I have to say.  The thought of glue on my embroidery just seems wrong, and I was worried that it would make it stiff or hard, or leave obvious marks.  I was also worried that the water might make the paint run and mark the threads.  I was worried that it may not make the stitching stiff enough, and hold the threads properly for the next stage and everything will unravel.

I'm still a bit worried about that last one, actually, but I think it'll be ok. I'm happy to say that it all seems to have worked out very well.  The paint didn't run, the stitches have dried firm but not hard, and it hasn't marked the front of the work at all.  What a relief!

The next stage is a bit scary too, though I think I'll put it off as long as possible with some necessary prep work!

Thursday 3 July 2014

Apple tree fire screen - finally completing the stem shading

It's taken a while, but the reworked shading on the stems - and so all of the embroidery - has been finished.

Here's half of the stems redone:


And the rest:


It's made a big difference, and I'm glad I decided to over-stitch the too-pale bits.

So that's all the embroidery done.  The next stage in the process is not something I've done before, and it's making me very nervous.  Wish me luck!