Friday 30 January 2015

Plantagenet Wreath - outlining the stems

Annoyingly, I forgot to take a photo of the fabric off the paper it had been on when it was painted and put onto a frame ready to start, so we'll just have to skip that bit and go straight to it with some stitching on.

I'm not going to be doing much in the way of shading in this project, so while I'll be using three shades of green stranded cotton, it's not with a view to producing any shaded effects with them.

Here they are:


Using the middle shade, no. 1410, I've outlined the stems in split stitch:


I'll outline the broom flowers next.

Tuesday 27 January 2015

Plantagenet Wreath

I am something of an amateur history buff.  I'll happily read books or watch TV programmes about just about any historical period, though there's something fascinatingly ghastly about the Middle Ages, and I recently read The Plantagenets by Dan Jones, which I can very much recommend.  I'm also a big Shakespeare fan.  Last autumn, I was lucky enough to see the RSC productions of Henry IV Parts I and II, which were just wonderful, and over the Christmas holidays watched my DVDs of the BBC's marvellous Hollow Crown productions of Richard II to Henry V.  All this has left me wanting to stitch something.

And here that 'something' is:


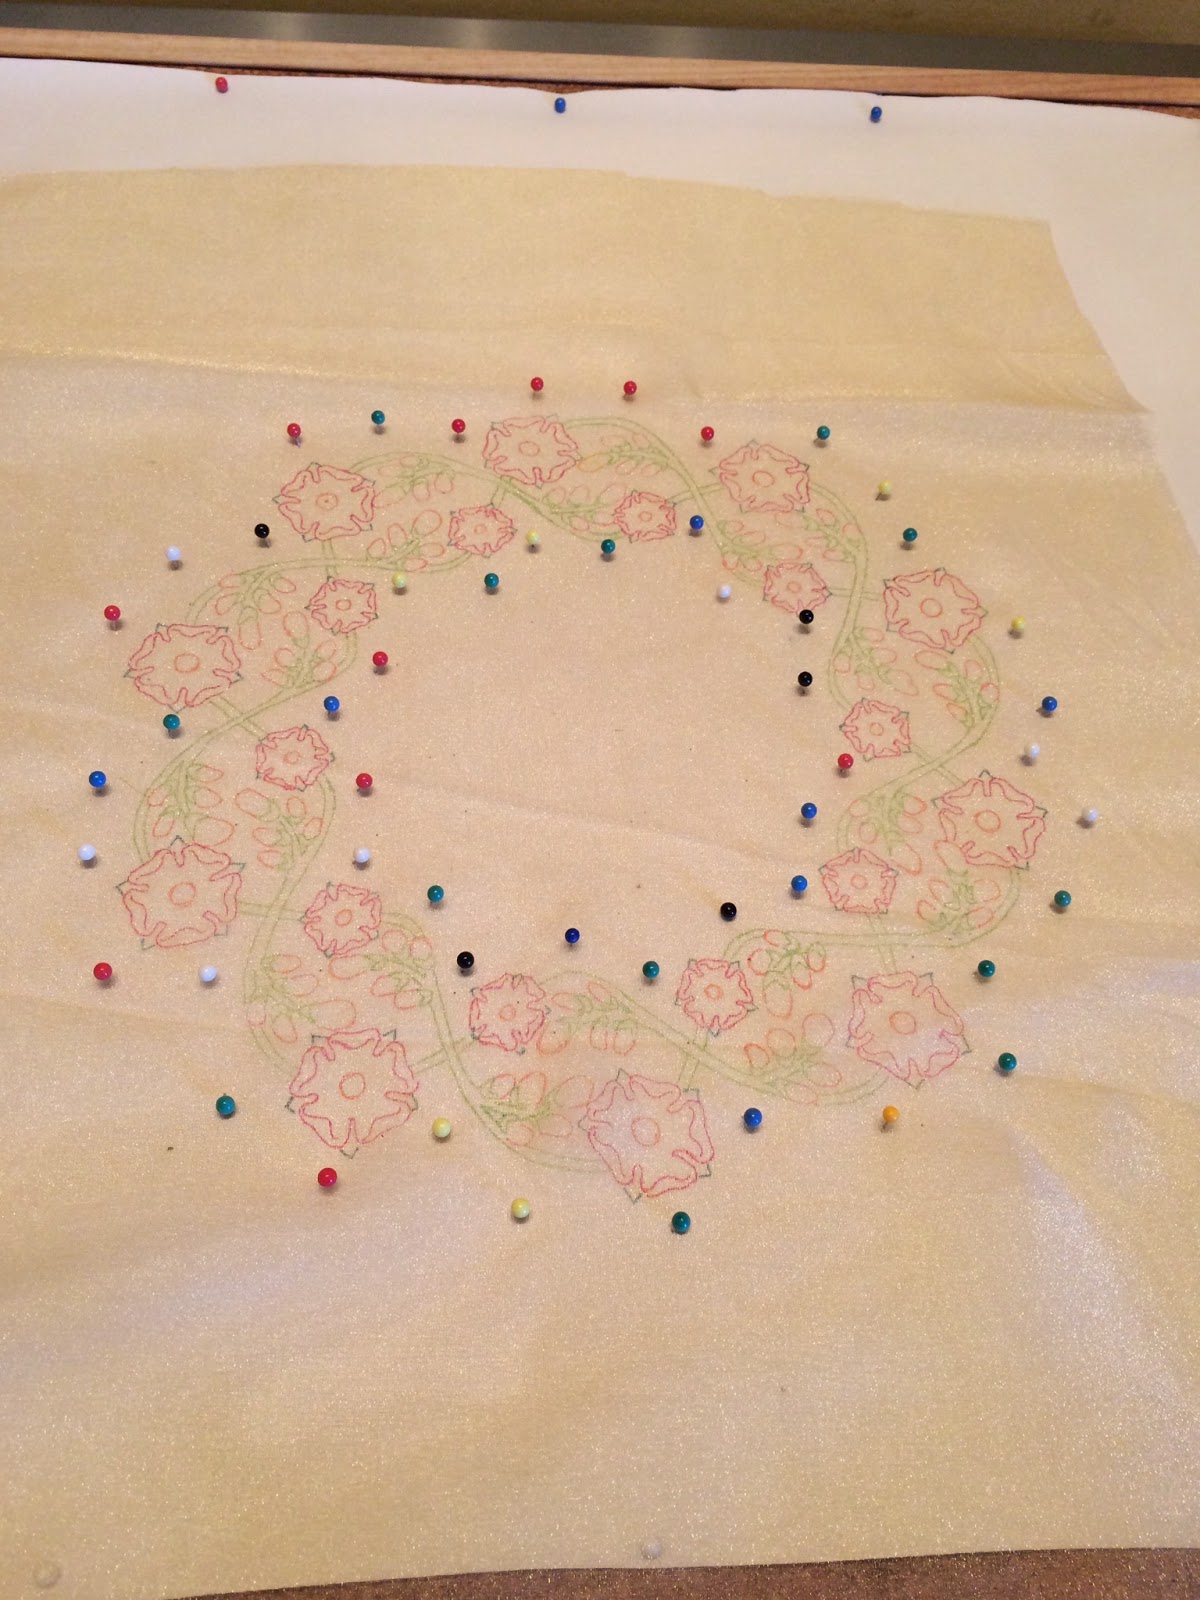
This is a stylised wreath design, 28cm (11") in diameter, with its underlying structure formed by two overlapping circular sine waves, which will form stems.  The flowers themselves are roses and broom - planta genista - the original emblem of the Plantagenet family and the source of their name.

Traced onto gold organza in colour:


I'm going for a Yorkist version here so the roses are going to be white, but I need to be able to see the outline so I traced them in red as the finished embroidery will be appliquéd onto a dark red velvet.  If I do a companion Lancastrian version then the roses will of course be red.

The traced design without the drawn version behind it:


Painted:


I'll start the outlining next time.

Sunday 25 January 2015

All the snowdrops

All three snowdrop samples together:


Which one do you like the best?

Tuesday 20 January 2015

Shaded snowdrop - cutting out and making up

Having painted the pack of the finished embroidery with diluted PVA glue and left it overnight to dry, I cut out the snowdrop:


I'm getting used to dealing with the fiddly shape by now!

This time, I'm applying it to a green velvet background, for a complete contrast with the previous snowdrops.  I used one strand of the appropriate shades to stitch it down around the edges, tucking any wisps of the organza under as far as possible:


And trimmed and finished with a backing fabric, to neaten it up:


I think that's it for snowdrops for the time being, but I do thinks it's a pretty design.  It's worked well in the three different ways I've done it, and I'm sure would lend itself to other interpretations too.

Friday 16 January 2015

Shaded snowdrop - stems

Just the stems to go.  Using the lighter of the two shades of green, Madeira no. 1410, I added a few stitches in highlight areas:


I then extended these areas using one strand of 1410 and one of the darker shade, 1411:


I then filled in the rest in 1411:


Finished!  Cutting out and making up next.

Tuesday 13 January 2015

Shaded snowdrop - flowers and roots

With the outline done, time to start filling in.  The snowdrop flowers first, using Madeira stranded cotton no. 2402.  I'm not doing any shading here, just the off-white:


The stems and leaves are going to be slightly more involved so I'll come back to them; roots next to get them out of the way:


The roots are in no. 2114, and again don't have any shading.  I am going to use some shading on the stems and leaves, though, and I'll start that next.

Thursday 8 January 2015

Shaded snowdrop sample - outlining

With the design marked onto the fabric, it's time to start stitching.  This time, I'm going for naturalistic colours:


That's Madeira stranded cotton no. 2402 (off white) for the snowdrop flowers, 1410 and 1411 for the leaves and stems, and 2114 for the roots.

I outlined the flowers with spilt stitch first:


It's not that easy to see in the photo, but the flowers are outlined, honestly!

Then the stems and leaves, using the darker of the two greens, 1411:


Then finally the roots:


I'll start filling everything in next.

Sunday 4 January 2015

Shaded snowdrop sample

Happy new year everyone!  I hope you all had a great holiday and are now raring to go.

I'm starting the new year much as I finished the old one, with the snowdrop design, though for the last time (probably).  This final time, I'm going to do it in colour.

So, here we go!  Tracing the design onto silver organza:


Painting with diluted acrylic paints:


The green of the stems ran a bit into the brown of the roots, but never mind - it'll be covered with stitches.

Off the paper it had been pinned onto, and stretched onto a frame:


Stitching next!