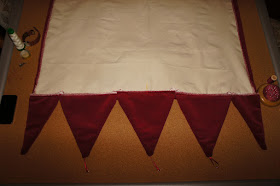
In the desciption of the lost Medieval banner in the Rites of Durham, the banner is described as "five quarters [of a yard] deep", with a red and gold fringe and silver bells along the bottom. Fiona, the designer, used the size, along with the rest of the description, to produce a basically square banner, with deep points 9" (a quarter of a yard; 23cm) long, from which bells will hang. It's these I'm doing next.
There are three full points, and two "half" points, one at each end. This means eight pieces of fabric lined and edged:
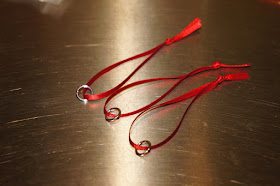
The silversmith making the bells provided three jump rings - I'll let him explain why:
I don't want to hang the bells from the fringe, but they need to hang at the level of the fringe, so I threaded them onto loops of ribbon, knotted to stop them falling off and getting lost before they were sewn in:
The half points were folded over, tacked, and the line to be machine stitched was marked on:
And the full points too:
If you look closely, you can see the end of the ribbon poking out of the bottom.
These were machine stitched, with an extra line of stitching across the bottom, to make sure that the ribbon with the jump ring was secure:
And all turned right side out:
The points aren't as pointy as I might have liked, but once the fringe is on it shouldn't matter, and you can see the ribbon loops and jump rings for the bells quite clearly.
When attaching them to the Banner itself, to get the spacing right, I tacked the half points in place at the edges first, then one of the full points in the centre, aided by the usual tailor's chalk marks:
With the other two points added, they were all back stitched in place with upholstery thread, and herringbone stitched along the top:
Then, as with the tabs along the top, I ladder stitched the fronts of the points to the main panel:
That's the back of the Banner finished. In fact, it's very very nearly finished all the way together...


No comments:
Post a Comment