Tuesday 31 December 2013

Druid banner - final blue spirals

Sorry for the long gap between posts, but it's a busy time of year!  I've been having a lovely few days off with family, and I hope you are all enjoying whatever holiday you celebrate, or just life in general.

The central section is the last to be worked in the light blue.  As with the side pieces, it's just half - or less than half - of the full area that will eventually be done.

Here it is:


All the light blue spirals, completed:


It's starting to become clearer how the design is going to work, isn't it?

Next, the bottom half, in green.  See you in the New Year!

Friday 20 December 2013

Druid banner - top spirals

Just a quick catch-up today.  Having completed the spirals down the side, I did the ones along the top.

And here they are:


All work so far:


The central section will be the last for this stage, with the light blue.  That's next!

Sunday 15 December 2013

Druid banner - couching the spirals on the sides

Now I've started stitching, it's just a case of continuing with the couching and following the lines of the design.  To recap, the first section I'm doing is the spirals on the top half of the circle outside of the trilithon, in a couched variegated light blue metallic thread.  The trilithon breaks the design up into a few distinct areas, which I can tackle one at a time.

So without further ado, here's the first one:


I'm really pleased with how it looks - the variegated metallic thread gives a nice, almost iridescent, effect, I think, and it catches the light beautifully.

Here it is in context:


And the section on the left:


All work so far:


I think it's coming along very nicely!

Saturday 7 December 2013

Druid banner - threads and couching

Time to start actual embroidery!

Now the design, or the part of it I'm starting with, anyway, is transferred to the front, I can embroider over the top of it.  I'm using Benton & Johnson coloured metallic threads, and for this section I'm using Marine Blue, which is a lovely variegated one.  I'm couching it (I'll explain what this is in a moment), and using Gutermann rayon machine embroidery thread no. 1134 for that:


Couching is where one thread, in this case the metallic one, is laid on the surface of the fabric, and stitched down with a second thread.

Contrasting colours can give a nice effect, but in this case I want the couching thread to be as little seen as possible, so I'm using a thread that's as close in colour as I could find, quite fine, and quite shiny, so it doesn't break the shine of the couched thread.


Here, you can see two strands of the metallic thread on the surface of the fabric, laid over the transferred design, and being stitched down with the finer thread.

I started with the outer circle:


After a bit of fiddling around with camera settings I've managed to get something that's reasonably close to the real colours, which is a relief, as with my earlier photos you really weren't getting an accurate impression of what it was like.  Now, hopefully, you should be follow work as it progresses much better.

Sunday 1 December 2013

Druid banner - getting the design onto the front

Last time, I'd mounted the fabric to be stitched onto an embroidery frame, complete with a back-to-front ironed-on transfer of the design on the back:


That's all very well, but I need the design on the front, in order to stitch it.  Now what?

To get the design from the back of the fabric onto the front, I stitched over the transferred design on the back with small running stitches:


Here, I've done the section on the right, to one side of the 'trilithon'.  I've used a fairly dark blue sewing thread, so that later on it won't be seen.

This has the rather unfortunate side effect that it can't really be seen in my photographs, either.


I'm afraid photography isn't my strongest suit (I expect you've realised that!) and I've done my best, but it's not marvellous and it makes the green fabric look a nasty muddy colour that is not how it looks in real life at all.  Anyway, if you peer at it as best you can, you should be able to see the design in a dotted line formed by the running stitches on the front fabric.

There's a brief overview of different methods of transferring a design to fabric here, but despite being by far the most time-consuming, this is definitely my favourite.  It's great for getting a design onto dark fabric where other methods are hard to see, and, most importantly, it doesn't mark the top fabric at all.  If I decide a line is in the wrong place I can just unpick the stitches and it's as though it was never there, while all other methods that mark up the top fabric can leave traces that can be very difficult to get rid of.  It might take a while to do, but it's worth it.

Back to the design.  I'm going to be building it up in stages, which should make sense as I go along.  The first stage is the spirals in the top, blue, half outside of the trilithon.  Once all the running stitches have been done over the design on the back, I have all the design for the part I'll be working on first transferred to the front:


Time to start proper stitching!

Sunday 24 November 2013

Druid banner - transferring the design and getting set up

So, I have a transfer of the design. Now what? I'll get onto the fabric for the front of the banner in a moment, but right now you need to know that it's going to be lined with a fine linen.  This won't be seen, but acts to support and strengthen the top fabric.  It also comes in very handy as a means of transferring the design without risking getting marks on the top fabric that you don't want.

The transfer is heat activated, and needs to be ironed on.  I stitched it transfer side down to a piece of linen cut to size:


There's always a danger when ironing it that the transfer might shift slightly, which can lead to smudging or double lines.  The larger the design the more likely this is to happen, and the more complex the design the more of a problem this is to work with later.  As this is both large and complex, I was very careful indeed with fastening the tracing paper to the linen, tacking it down in a grid pattern, with lines of stitching roughly 5 cm (2") apart.

If you're paying attention you'll have spotted that as the traced side is face down, the text is now back to front.  Don't worry, it's meant to be like that!

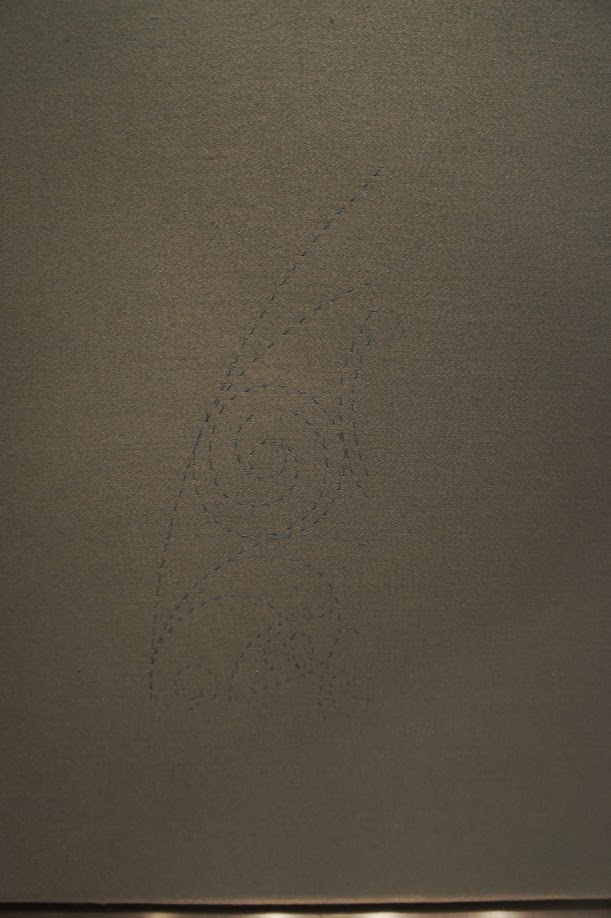
After some very careful ironing, I took out all the tacking stitches and cautiously removed the paper:


Fortunately, it's fine, which was a relief!  It looks rather faint in the photo, and some areas were faint enough for me to go over them with a pencil to make them clearer, but in real life it's going to be fine to work with.

The next step is to attach the linen to the top fabric, the one that'll be seen.  Regulars will know I tend to work with silk, but in this case I didn't think it was appropriate. I want the banner to be robust enough to be used in outdoor events, which in the UK will mean suitable for use in all weathers.  As such, I've chosen a cotton sateen, in jade green. This is still a natural fabric, is hard-wearing, has a nice sheen to it, and as it was often the fabric of choice for miners' banners, traditionally paraded through the streets of mining communities in Northern England, should be able to stand a bit of rain.

This was also cut to size, tacked to the linen, and using an overlocker, the edges were neatened and the two pieces of fabric joined together:


(I cut and joined the fabric for the back of the banner too, but as that's going to be left plain we can ignore that from now on.)

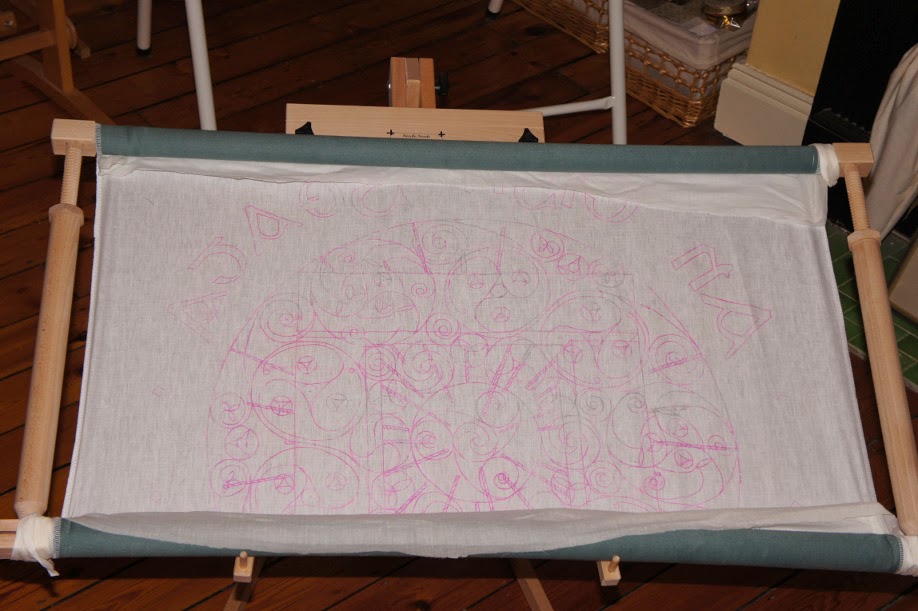
It was then stretched in a frame ready to start sewing.  I have a frame wide enough (just!) for the width of the banner fabric, but it has to be rolled onto the top and bottom bars, leaving an exposed area to stitch on, which will need to be moved as I progress.  As when it's rolled the transfer on the back will be in contact with the fabric on the front and I don't want to risk any rubbing off and marking it, I placed some muslin over the top before I rolled it, so if any of the transfer does rub off, it'll do so onto that.


That's a lot of preparation, but it's all absolutely necessary to do a proper job.  Now it's time to start sewing!

Tuesday 19 November 2013

Druid banner - making a transfer

Last time, I told you about my new project, and showed you my design, and now I'm making a start. Regular readers will have seen the process of transferring a design to fabric and getting this set up before, but in case there are any new readers following this project, I'll cover the process in some detail.

The colour designs are good to give an idea of what the finished item should look like, but in order to mark up fabric to stitch, however, it's better to have a black and white version:


I got this printed out full size at a local copy shop; here it is, taped to my dining table, as it's too big for the table in my sewing room:


The first step is to make a transfer from this.  You can buy special transfer pencils, so with a large piece of tracing paper taped over the top, it's just a case of carefully drawing over the lines:


It's a bit hard to tell, but if you look closely, you can see that the central spiral is a bit pink, from the transfer pencil line.

It's even harder to tell here, so you'll just have to take my word for it that I've traced the entire design:


Having the transfer is one thing, but next I need to apply it to the fabric itself.  That's next!

Saturday 16 November 2013

'An Tigh Geata' - Druid banner

I'm thrilled and excited to be able to tell you that I'm making a new processional banner, this time for the Order of Bards, Ovates and Druids (OBOD).  It's the Order's 50th anniversary next year, and the new banner, replacing one from the 1960s which was lost, will be part of that.

The lost banner incorporated various symbolic elements significant to Druidry, and I was asked to use them too as part of my design.  I'm not knowledgeable enough to explain things properly, but if anyone wants to know more about Druidry then the website has lots of information, or I'm sure the lovely friendly people there would be happy to help.

So, without further ado, here's my design:


The trilithon gateway (the Stonehenge-style standing stones), the rays of light and the Gaelic text were requested by OBOD and had been used in a different way on the old banner; the colours represent the three grades in Druidry (blue for bards, green for ovates and white for druids).

In my design I interpreted these colours as earth (the lower half of the spiral circle), sky (the upper half), and stone (the trilithon itself).  The Celtic spirals are my addition, but I think they work well with the other elements.

It's going to be a similar size to St Cuthbert's banner, and so able to be carried by one person:


It's great to be working on a larger piece again, and I can't wait to get started!

Wednesday 13 November 2013

Spiral Abstract I - V

As suggested by regular reader Cynthia of California Stitching, here are all five Spiral Abstract pieces.

Spiral Abstract I


Spiral Abstract II


Spiral Abstract III


Spiral Abstract IV


Spiral Abstract V


I have another series of five related pieces in mind, but they're going to have to wait - next time, I'll tell you why!

Sunday 10 November 2013

Spiral Abstract V

This is the final one of the set of five Spiral Abstract pieces; I intend doing another related set of five, but they're going to have to wait as I'm about to start a really exciting new project instead.  More on that in future posts!

Back to today's though.  As with the others, it's silver chain stitch on a black silk matka background.  The design, transferred onto the linen on the back:


Tacked through to the front:


And stitched:


I'm very pleased with how they've turned out - I think they work well as a series.

Monday 28 October 2013

Spiral Abstract IV

This is all going better than expected!  I've now finished the fourth one in the series, though it does have rather less stitching in it than the others.

Here's the design, as a transfer on the lining fabric on the back:


Then overstitched with running stitches to transfer it to the front:


And then stitched properly in chain stitch, with Gutermann silver metallic thread:


Just one more to do in the Abstract series.

Wednesday 9 October 2013

Spiral Abstract III

Onto the third piece in the series.  Everything is the same as before other than the design, so without further ado, here it is:


Tacked through to the front of the fabric:


And stitched:


Finished!

Thursday 3 October 2013

Spiral Abstract II - stitching

With the design transferred to the front of the fabric, I just needed to stitch over it, with the same silver Gutermann metallic thread as before.

It's in three sections, so here's the first:


And the second:


And the third:


Finished!

Wednesday 25 September 2013

Spiral Abstract II

The second in the series - the same size, fabrics, thread and techniques as before.  The transfer ironed onto the back of the lining linen:


And then after running stitches have been used to go over the design to transfer it to the front:


It shouldn't take too long to stitch.

Sunday 8 September 2013

Spiral Abstract I - going well

Early days yet, but my exhibition project is going well so far!

Last time, I'd ironed on a transfer of the design of the first (of five) abstract Celtic spiral designs onto the linen used to line the surface fabric.  This, I can now reveal, is black silk matka, the same fabric I used for Kate's Crow.  I've used matka in different colours for quite a few projects (cushions, pictures) now, and I really like it.  I like silk fabrics generally, but I think this is my favourite as it seems quite contradictory; it looks quite rough, almost tweedy, but is actually very soft, and is matt, without the sheen of most silks.  I'm particularly fond of this matt look, as it means that metallic threads look extra sparkly when stitched onto it. And, of course, that's what I'm using now: Gutermann metallic thread no. 41, silver.

(By the way, while I would love to be buying my fabric locally, there are no shops near me that sell it or pretty much anything else silk, apart from maybe a bit of habotai or sometimes some cream dupion during wedding season.  I buy the matka and most of my fabrics by mail order from Hansson of Guildford.)

So, back to the stitching.  To transfer the design to the front I used my long-winded but tried and tested method of stitching over the transfer on the back in small running stitches, in this case in a pale grey sewing thread:


I can then stitched over this is in the silver metallic thread, using chain stitch:


The great thing about this method is if I decide a line is in the wrong place, I can just unpick the stitches and it's like it was never there.  I'm always nervous of marking my surface fabric, and this is the least invasive method I know.

Anyway, a bit more stitching (I know it looks almost white in the photos, but it really is silver in real life):


And a bit more:


And finished already!


Tuesday 3 September 2013

Spiral series - Spiral Abstract I

Apologies (again) for the silence - I've been busy, but I'm afraid on stuff I can't discuss as I don't have the clients' permission.  That all sounds very mysterious and dramatic, but it isn't really!

No difficulties in talking about my next project, though: I want to put together a small exhibition of work.  I don't have a venue yet (I know where I want, but I may not get it.  I'll keep you posted!), and have decided to do a series of pieces as variations on a theme.

The theme in question is Celtic spirals; I'm going to do 10 pieces in total, with two sets of five interrelated items.  They'll all be done in the same materials and technique, and the same size, providing continuity.

I'll get onto the second set later, but the first one is of abstract Celtic spiral designs.  Some of you may remember previous pieces that I did, Kate's Crow and Moon.  Both have a complex spiral design as a background.  This is probably cheating (I'm going to regard it as recycling), but I dug out the original designs for the backgrounds:


and to form the abstract patterns, I traced sections of these designs, mixing them up a bit as appropriate.

Here's the first one, as a transfer ironed onto linen which has then been attached to the surface fabric:


Time to start stitching!