Sunday, 23 June 2013

The Hepworth Gallery, Wakefield

On Friday, I went on an Art Fund trip to the Hepworth Gallery in Wakefield and the Yorkshire Sculpture Park. I hadn't been to either of them before and thoroughly enjoyed both, though I could have done with more time for a better look round.  I saw all I could in the time available, though!

Hepworth Wakefield
While the Hepworth Gallery concentrates on the work of Barbara Hepworth (you probably guessed that bit), it also has far more than I'd expected by other artists, which was a bonus. A couple of large spaces were dedicated to an exhibition by Haroon Mirza; part of this consisted of works borrowed from the gallery's collection and arranged:

Haroon Mirza installation from the front

And from the back
I have to say, I think incorporating a piece by Henry Moore into your own work is cheating a bit.  I preferred his work that didn't borrow quite so heavily from others:

Haroon Mirza light installation
There were also major exhibitions on William Scott and Post-War British sculpture and painting, but neither of them allowed photography, I'm afraid. You're just going to have to take my word that they're well worth seeing.

Some other items, on loan from York Art Gallery, could be photographed, such as this wonderful painting by John Piper:

Stair Hole, Lulworth, by John Piper
Onto the Hepworth pieces. There were some limited restrictions on photography, but most items were fair game.  I wasn't very good at taking a note of what's what, though, but just try and appreciate them as a whole.

Smaller sculptures:


Prints:


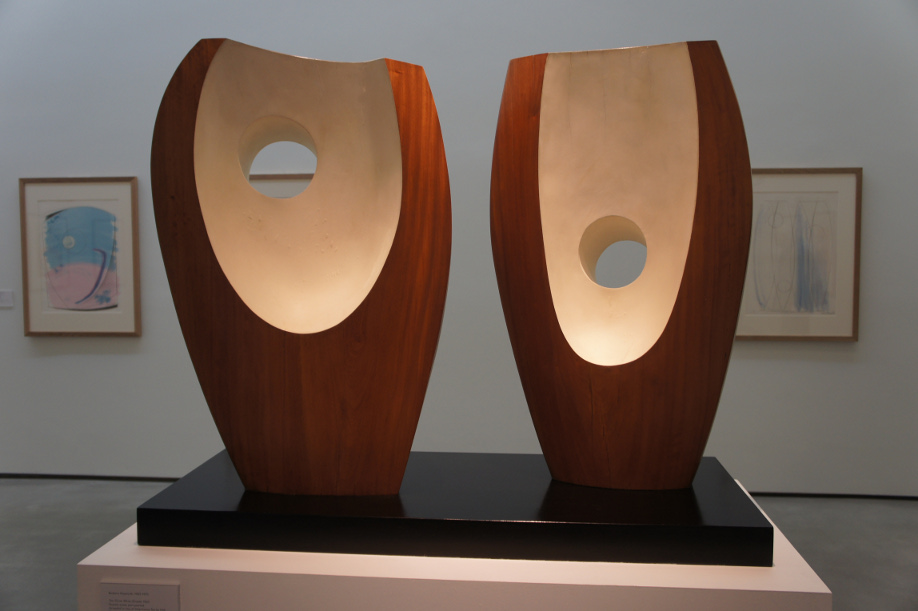
Larger works:


The magnificent Winged Figure:

Winged Figure, Barbara Hepworth

You don't get any sense of scale in the photo, but it's absolutely huge; this is a full-size aluminium model for a piece on the exterior of the John Lewis building in London.

And all together:


One of the most interesting galleries covers how Hepworth worked, with her tools and equipment:


It showed how she would carve blocks of plaster to give the forms she wanted and which could then be cast in bronze, or working with metal mesh, which would then be covered with hessian and plaster:


This piece was intended to show how bronze pieces were then given an oxidised finish, but I just liked the colours:


Next time: the Yorkshire Sculpture Park.

Tuesday, 11 June 2013

100% silk velvet: the results

A quick update on the kitchen: it's coming along well and is on schedule, though the mess is still indescribable.  The messy, building phase should be finished at the end of this week, happily, though there's still a fair amount of work to do after that.

But back to silk velvet.  So far, I have found three suppliers of pure silk velvet, across three continents.

Firstly, Oh So Elegant in Australia.  I ordered a small amount of fabric from there for a test piece a while ago, and it was very nice indeed, though quite a light weight - more a dressmaking fabric than upholstery weight, but still good for smaller items.  They were very nice to deal with, too, and sent my order promptly.  Their velvet is currently Aus $100 a metre.

Next, Delectable Mountain Cloth in America.  This firm was recommended by several people, but I have to admit to being a little disappointed.  I contacted them to ask if they supplied silk velvet; they confirmed that they did, in an upholstery weight, but didn't keep it in stock and would need to order it in, at around US $200-$400 a yard (they weren't more specific).  So far so good, but when I asked for further information - how wide is it?  Can I order swatches? - I didn't get any response at all.  I've chased a couple of times, but they're still to get back to me.  Disappointing.

Finally, back to Europe, and Prelle in France.  Prelle are manufacturers, not just suppliers, though they do sell directly too.  They produce both silk and silk/wool blend velvets, in quite a heavy weight; the silk velvet is £274.60 per metre (I suspect that's converted from Euros), and the silk/wool is £280.  They're very nice to deal with, extremely helpful, and supplied quite large swatches at no cost very quickly.  There is a downside, however, in that their velvets are only 64 cm (25") in width, which may not be suitable for larger items, and means that it's even more expensive than it looks.

This is all the information I have so far, but if anyone knows of any other suppliers, I'd be very happy to add them to the list.

Wednesday, 29 May 2013

Sorry for the silence...

... but I've got the builders in.

Keeping the house more or less clean is enough of a challenge right now without risking any embroidery, so I'm not going to have much to report for a few weeks.  I'll post if and when I can, and look forward to having a lovely new kitchen!

Friday, 24 May 2013

Lindisfarne Stones: the finished piece


I only just got Lindisfarne Stones finished in time, and it's now been handed over for the exhibition in Durham Cathedral, but I took a few photos of it before it went.


Next to the gold, the pale carved stone looks almost luminous:


And the gold stitching sparkles in the light:


I'm very much looking forward to seeing it in the Cathedral - I'll let you know how it goes!

Sunday, 19 May 2013

Lindisfarne Stones: assembly


With all the stitched sections finished, it's time to put it all together.

I cut pieces of mount board, to form the 'box':


The top of the box needs to have a hole cut in it to frame the carved stone; to do this, I first traced the shape and stuck it to one of the larger pieces of mount board:


I roughly cut as much of the central section away as I could, then cut slits up to the line, and very carefully cut away each section:


You can see I've made a start round the left dog's nose.

Fully cut:


And tidied up a bit:


The stitched panels were cut out, leaving a margin:


The side panels were attached to the board sections, and stitched together at the sides.  I have to confess: I used PVA glue to attached the margins (not the stitched area) to the board.  I know from past experience that trying to lace skinny and awkward shapes is next to impossible, so I decided at the start that I'd glue them.


There was a problem, though - the heavy stitching had drawn the felt shapes I was stitching over in a bit.  These felt shapes had been cut exactly to size, so this meant that they were now slightly too small.  Just a couple of millimetres, but enough to be obvious.  If I was making a box I'd just have made it slightly smaller, but that wasn't an option here as they're a snug fit around the stone anyway, so some way of disguising the seam was needed.

Red ribbon!

The sides slotted over the stone very nicely:


The base was covered with red velvet, and ladder stitched to the sides:


Here's a last look at the top of the stonework, sitting in its box:


And with the top, attached to the cut board, added, leaving the carved design showing through:


More red ribbon covering the seams:


And finished!


I'll take some photos in better light, to show it off.

Thursday, 16 May 2013

Lindisfarne Stones: a note on the design


Before I get onto the assembly of the final piece, I wanted to point something out about the design.  It is of course a grid pattern, based on one used in the Lindisfarne Gospels and on contemporary stone crosses.  On the top of the piece, I did my best to keep this as accurate as possible, conforming to the grid closely:


However, I didn't want the sides to be that formal.  Unusually for me, as I usually have things very precisely planned before I start work, I wasn't quite sure what I wanted to do, and changed my mind at the last moment.

Initially, when I was drawing up the designs, I'd pictured the sides with the same grid, but less of it:


I wasn't happy with this, though - it didn't cover the area as I wanted - so I redrew it using the grid to cover all the space:


Even this wasn't quite right, though.  When I started work I realised that what I wanted was the same grid, but loose, as though it was falling apart.  Drawing a deliberately 'loose' grid and sticking to it rigidly seemed to be missing the point, however, so I marked up the background with the design, and then as I stitched deliberately didn't stick to it, but just used it as a guide to the overall pattern.  This felt an odd thing to do, and wasn't as easy as it sounds, believe me!

It did however give me the effect I wanted:


You can see that the angles are slightly off and things don't quite align: the grid, but not quite the grid.  The intention is that when it's assembled, the grid will fall over the edge and start to break down.  We'll see how well that works as I put it together!

Wednesday, 15 May 2013

100% silk velvet

A quick post to ask for help: can anyone recommend a supplier of 100% silk velvet (i.e. not silk/rayon mix)?  Ideally I'd like a supplier in the UK, but someone who can ship here would be fine too.

This is with an eye on a future project which may or may not happen, but it would be good to know regardless!