At the top of the page, as the big headline image behind the name of the blog, is the Dragon. He's quite possibly my favourite thing I've ever made, and I don't know why it's taken me until now to tell you about him. Here he is, looking splendid:
He's 3D and entirely freestanding, and is in goldwork, using coloured threads to couch the gold thread down; the idea was that this would look like scales. His underside and the underneath of his wings are couched with a plain thread, so they look gold rather than coloured.
The original design was actually based on a cut-out-and-glue-together mobile from a book (Dragon Mobiles by Anne Wild); as this was meant to be hung up rather than standing it needed a little adaptation to make sure it was level, but not too much, plus some areas, like the wings and legs, needed to be made in two pieces rather than the one used in the mobile, to give a front and a back.
There are quite a lot of individual parts, each of which was stitched separately. They were then cut out and mounted onto thin card (for the flat bits), pelmet Vilene (the wings, which were also wired), or a flexible plastic (the underside, which forms quite a complex curve). All the sections were then ladder stitched together, then pearl purl was couched over the seams, to hide them.
He's a few years old now, and as he's been shown quite widely and hauled in and out of boxes, he's starting to show his age. The main problems are with his ankles, which have got quite weak; the card inside must have bent, and once there's a fold there, it'll always bend at that point. I think surgery may be required - I need to open his legs up and splint them somehow.
Because of this, and because I don't want him to get tatty, he's now retired, and no longer goes out, except for very special occasions. Here he is relaxing at home, in his spot on a bookshelf:
I've made a few 3D items (such as the Dodecahedrons) and I'd like to explore this further when I get the opportunity, but I don't think I'll ever made something I'm as fond of as my goldwork Dragon.
Sunday, 9 January 2011
Tuesday, 4 January 2011
Starting the second panel
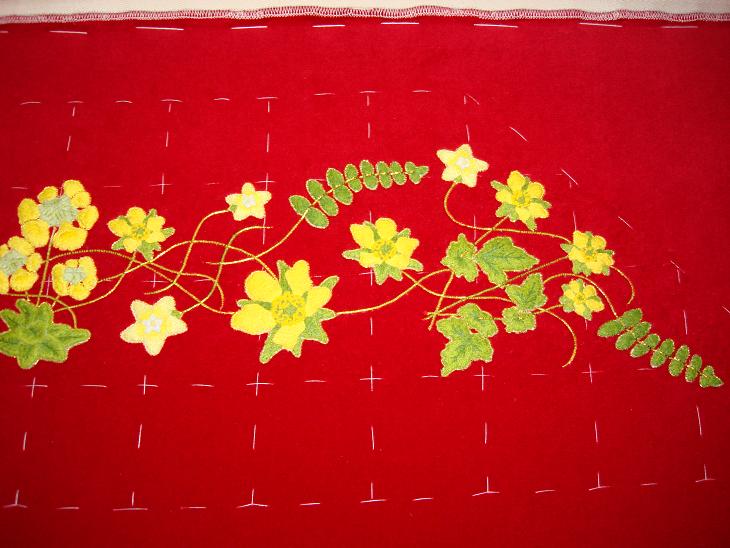
Back to the beginning and starting the second Banner panel. For no particular reason, I'm doing the left-hand side one next, which you may be interested to hear introduces a new flower. More on that when the time comes.
Mostly, however, it's flowers you've already seen using techniques I've already described in detail. As such, I'm going to be going into rather less detail this time around, unless something worth mentioning comes up. I'll keep you up to date with progress, though - you won't be missing anything, just not getting the blow-by-blow account.
I also thought I might write the occasional post on non-Banner matters, such as previous work of mine, or even touching on the 'inspirations' idea lurking in the sub-heading in the top banner and I'm afraid largely ignored thus far.
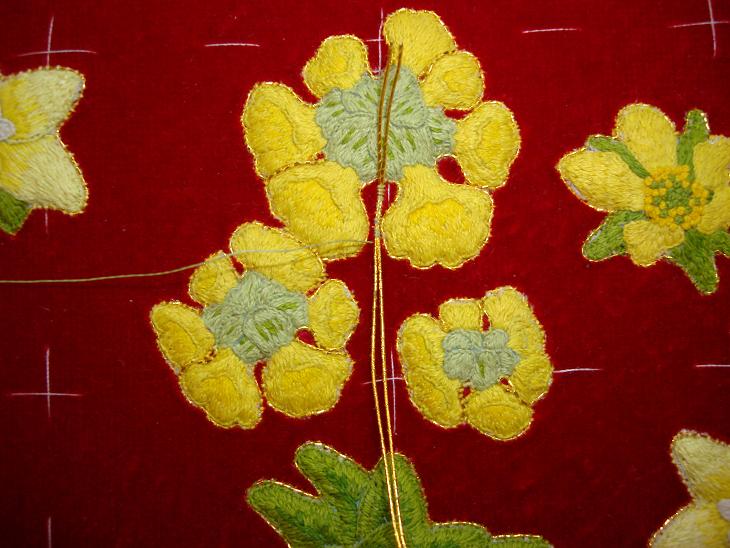
That's for the future, though. For today, pearlwort flowers. There's just the one sheet of them to do for the left panel:
And completed:
That dark speck to the lower left is blood, which I also managed to get all over the embroidery frame before I even noticed I was bleeding, but not on any of the flowers, which was a relief. It's a dangerous business, sewing!
Mostly, however, it's flowers you've already seen using techniques I've already described in detail. As such, I'm going to be going into rather less detail this time around, unless something worth mentioning comes up. I'll keep you up to date with progress, though - you won't be missing anything, just not getting the blow-by-blow account.
I also thought I might write the occasional post on non-Banner matters, such as previous work of mine, or even touching on the 'inspirations' idea lurking in the sub-heading in the top banner and I'm afraid largely ignored thus far.
That's for the future, though. For today, pearlwort flowers. There's just the one sheet of them to do for the left panel:
And completed:
That dark speck to the lower left is blood, which I also managed to get all over the embroidery frame before I even noticed I was bleeding, but not on any of the flowers, which was a relief. It's a dangerous business, sewing!
Labels:
Buttonhole stitch,
Flowers,
Split stitch,
St Cuthbert's Banner
Monday, 3 January 2011
Looking back - and forwards
Happy New Year! I hope it's a peaceful and prosperous one for everyone.
In reflective mood, I've been looking back at what I achieved, on the embroidery front, in 2010, and I must admit to being pretty pleased with it. There's no knowing what the future holds, of course, but it could turn out to have been a landmark year for me, with a couple of major steps forward. Time will tell.
I started the year by finishing a project - Kate's Crow:
This is (or will be, very soon) a birthday present for my sister, Kate, and it immediately became a favourite of mine from all the work I've done. I'm glad it'll be going to a good home! I designed the firescreen frame, but it was made, beautifully, by Little Newsham Forge, and it was a very exciting day when I saw the completed piece for the first time.
I had ideas for a small exhibition sometime later in the year, and after my first ideas just didn't work out (and I'm still not telling you what they were!), I decided on a series of three goldwork hangings using designs based on Spirograph spirals. These ended up as panels rather than hangings, and look quite dramatic:
Just for fun, and as a bit of break from miles and miles of goldwork, I made a couple of appliqué cushions, which I rather like:
A friend said they look "very designery"! I think this is a good thing...
The Spirograph panels and the cushions went on to take a starring role in one of the two big events of the year - being invited to submit work for the opening exhibition of a new gallery in Newcastle upon Tyne, the North East Art Collective. Here are two of the panels and the cushions on display there:
The awful weather put a bit of a dent in some of the gallery's plans, but with Spring just around the corner (I sincerely hope), it'd be great to think that this could bring my work to a wider audience.
The year's big story, though, was the return of St Cuthbert's Banner. This is the biggest and most prestigious commission I've ever had, and it's both an honour and a pleasure to be making it, even if it has rather taken over my life. The year ended on a high, with the completion of the bottom panel of the front of the Banner:
So, what does 2011 have in store? A lot more to do on the Banner, which won't leave much time for anything else, which in a way is a shame as there a couple of things I would very much like to do for the Embroiderer's Guild - a Regional exhibition and a Branch project - but I doubt I'll be able to, sadly. Though maybe if I aim small I can squeeze them in. We'll see!
And we'll see what else turns up too. Who knows what I'll be looking forward to in 2012!
In reflective mood, I've been looking back at what I achieved, on the embroidery front, in 2010, and I must admit to being pretty pleased with it. There's no knowing what the future holds, of course, but it could turn out to have been a landmark year for me, with a couple of major steps forward. Time will tell.
I started the year by finishing a project - Kate's Crow:
This is (or will be, very soon) a birthday present for my sister, Kate, and it immediately became a favourite of mine from all the work I've done. I'm glad it'll be going to a good home! I designed the firescreen frame, but it was made, beautifully, by Little Newsham Forge, and it was a very exciting day when I saw the completed piece for the first time.
I had ideas for a small exhibition sometime later in the year, and after my first ideas just didn't work out (and I'm still not telling you what they were!), I decided on a series of three goldwork hangings using designs based on Spirograph spirals. These ended up as panels rather than hangings, and look quite dramatic:
Just for fun, and as a bit of break from miles and miles of goldwork, I made a couple of appliqué cushions, which I rather like:
A friend said they look "very designery"! I think this is a good thing...
The Spirograph panels and the cushions went on to take a starring role in one of the two big events of the year - being invited to submit work for the opening exhibition of a new gallery in Newcastle upon Tyne, the North East Art Collective. Here are two of the panels and the cushions on display there:
The awful weather put a bit of a dent in some of the gallery's plans, but with Spring just around the corner (I sincerely hope), it'd be great to think that this could bring my work to a wider audience.
The year's big story, though, was the return of St Cuthbert's Banner. This is the biggest and most prestigious commission I've ever had, and it's both an honour and a pleasure to be making it, even if it has rather taken over my life. The year ended on a high, with the completion of the bottom panel of the front of the Banner:
So, what does 2011 have in store? A lot more to do on the Banner, which won't leave much time for anything else, which in a way is a shame as there a couple of things I would very much like to do for the Embroiderer's Guild - a Regional exhibition and a Branch project - but I doubt I'll be able to, sadly. Though maybe if I aim small I can squeeze them in. We'll see!
And we'll see what else turns up too. Who knows what I'll be looking forward to in 2012!
Thursday, 30 December 2010
...and to the left
Same again, but to the left of the cowslips this time. A few stems added:
A few more flowers linked up:
Leaves and ferns joined together:
All done:
That's the lot for the bottom panel. Hooray! Here's the full panel, completed:
This still has the layout grid on, of course, but with that removed, all that's left are the flowers, as they'll appear on the the finished Banner:
You can't tell in the photo, but the tacking stitches for the grid have left slight impressions in the velvet. I think this should largely solve itself and the pile of the fabric bounce back, so I'll leave it alone for a while and see how it gets on, but I may have to intervene. I've got ideas on what to do if need be, but does anyone have any tips?
I must admit that I'm pleased with how it's turned out - it's as close to a pretty tricky design as I could get, and I think it works well. It's quite a relief!
Back to the beginning now, though, and the start of the second panel...
A few more flowers linked up:
Leaves and ferns joined together:
All done:
That's the lot for the bottom panel. Hooray! Here's the full panel, completed:
This still has the layout grid on, of course, but with that removed, all that's left are the flowers, as they'll appear on the the finished Banner:
You can't tell in the photo, but the tacking stitches for the grid have left slight impressions in the velvet. I think this should largely solve itself and the pile of the fabric bounce back, so I'll leave it alone for a while and see how it gets on, but I may have to intervene. I've got ideas on what to do if need be, but does anyone have any tips?
I must admit that I'm pleased with how it's turned out - it's as close to a pretty tricky design as I could get, and I think it works well. It's quite a relief!
Back to the beginning now, though, and the start of the second panel...
Monday, 27 December 2010
To the right of the cowslip...
I hope you all had a happy and peaceful holiday; I had a lovely day with family, followed by a complete day off, doing nothing whatsoever. Bliss!
Back to work now, though. I've got a few days off the day job, so I want to get as much done as I can before I go back in the New Year. Things are coming along nicely, though, with all the flowers to the right of the cowslip edged (and yes I know I said I was going to start in the middle and work out, but it somehow didn't happen like that!)
Here are a few more flowers done, with stems linking the wood avens flowers and leaves together:
Then another fern and a pearlwort:
And the two larger wood avens:
And then some twiddly bits linking things up:
And finally, all of the right side, completed:
Back to work now, though. I've got a few days off the day job, so I want to get as much done as I can before I go back in the New Year. Things are coming along nicely, though, with all the flowers to the right of the cowslip edged (and yes I know I said I was going to start in the middle and work out, but it somehow didn't happen like that!)
Here are a few more flowers done, with stems linking the wood avens flowers and leaves together:
Then another fern and a pearlwort:
And the two larger wood avens:
And then some twiddly bits linking things up:
And finally, all of the right side, completed:
Thursday, 23 December 2010
Curved stems
Other than the cowslips, all the stems on the panel are wavy or curved. I applied all the flowers more or less by eye, aided a lot by the grid, and that's what I'm doing for the stems too. Well it's worked so far! All the same, I'm not a make-a-start-and-see-where-it-leads-you sort of person, and I like to have a pretty good idea of where things are to go.
For this stem, I started with a couple of couching stitches at the top of the thread, next to the flower:
Using Fiona's design as a guide, I laid the thread on the fabric, and moved it about until I was happy with the line it took. Unfortunately, it wasn't just going to sit there and wait for me to stitch it down - it needed to be held in place. So, I added a handful of stitches all the way down the thread:
Here it is with half a dozen or so stitches down the length of the thread:
This was enough to hold the shape of the line as I went back up the thread, couching it down with stitches spaced about a millimetre apart:
And with a couple more stems added:
For the first time, I actually quite like the fern!
For this stem, I started with a couple of couching stitches at the top of the thread, next to the flower:
Using Fiona's design as a guide, I laid the thread on the fabric, and moved it about until I was happy with the line it took. Unfortunately, it wasn't just going to sit there and wait for me to stitch it down - it needed to be held in place. So, I added a handful of stitches all the way down the thread:
Here it is with half a dozen or so stitches down the length of the thread:
This was enough to hold the shape of the line as I went back up the thread, couching it down with stitches spaced about a millimetre apart:
For the first time, I actually quite like the fern!
Wednesday, 22 December 2010
Cowslip stems
The flower stems are quite flowing (well, most of them), so I've decided to start from the centre again and work out, to get the flow right. This means beginning with the cowslips, which are actually the only flowers with straight stems.
To work the stems, I'm couching two strands of the same imitation Japanese gold thread that I used singly for the edging. I want the colours to remain consistent, so the couching thread is the same green as whatever I used for the leaves or flower sepals. As ever, though, the cowslips manage to make this more complicated than the other flowers. The cups at the bases of the flowers are the palest shade of green I've used, Madeira 1409, while the leaves are a shade darker, 1410. As the stems run from the flowers to the leaves, which one do I use?
Both!
Starting at the flower end, I couched the gold thread down with stitches quite close together, using the pale green thread:
I want to shade into the darker green as I go down, so I added a few stitches further and further apart, to about a third of the way down:
I then filled in the gaps and finished couching the gold thread with the darker of the two greens, so that they shade into each other:
The other two stems are very short, so I just used the one colour, 1410, for them.
So here's the cowslip, with it's stems added:
The rest of the stems on the design are curvy, wavy lines - I'll start them next.
To work the stems, I'm couching two strands of the same imitation Japanese gold thread that I used singly for the edging. I want the colours to remain consistent, so the couching thread is the same green as whatever I used for the leaves or flower sepals. As ever, though, the cowslips manage to make this more complicated than the other flowers. The cups at the bases of the flowers are the palest shade of green I've used, Madeira 1409, while the leaves are a shade darker, 1410. As the stems run from the flowers to the leaves, which one do I use?
Both!
Starting at the flower end, I couched the gold thread down with stitches quite close together, using the pale green thread:
I want to shade into the darker green as I go down, so I added a few stitches further and further apart, to about a third of the way down:
I then filled in the gaps and finished couching the gold thread with the darker of the two greens, so that they shade into each other:
The other two stems are very short, so I just used the one colour, 1410, for them.
So here's the cowslip, with it's stems added:
The rest of the stems on the design are curvy, wavy lines - I'll start them next.
Subscribe to:
Posts (Atom)